

Over the past year, I've been asked if I could provide a few tips to taking better photos. I thought it'd be easier if I wrote a piece and broke it down into sections with photos to illustrate my points. I'm always touched and filled with gratitude when people like my work. I'm neither a professional photographer nor an expert on the subject matter. I'm not the most technical person as I tend to work things backwards. I see the kind of shots that I'd like to create and then try to figure what kind of lens and techniques I need to acquire. Over the years, I've gathered a few tips here and there to hone in my skills but not after making countless mistakes. I still have a long way to go but I hope this will clarify and provide a few helpful pointers to improve your photography skills.
I find myself drawn to documenting people - how they're dressed, what they do and the expressions on their faces. I guess you could say capturing the moment in time. I love taking photos of the elderly. The wrinkles etched on their faces show character and tell a story. It's harder than taking a shot of the sunset or sunrise because all you have to do is make sure you're there at the right time, set up your tripod/monopod/bean bag and timer and pick the best spot. Taking photos of people is far more difficult because now you'll have to interact, be interested in what they do and make them feel comfortable while you're snapping away. Not an easy task if you're introverted by nature.
1. Equipment
Unless you're a professional photographer, there's no need to carry multiple camera bodies and lenses. Thanks to Photoshop, I no longer require the half a dozen filters along with its adaptor which I used to stuff into the pockets of my bag. The only one that I'll bring along is the polarizer. It cuts down reflections and adds extra richness to shots taken particularly in the afternoon. Although I'd love to get myself L series lenses along with the super duper Canon 5D Mark camera, I simply can't justify the cost. These alloy lenses weigh a ton too and between holding on to Little L and my current camera bag, it's all I can manage now. I use a Cath Kidston satchel or hubby's Bill Amberg's messenger bag as camera bag these days. I'm a mom so I have to carry Little L's treats, water bottle and whatnots and the camera bags on the market just don't cater to my needs. Currently, this is what I tend to bring:
Canon 400D DSLR camera body
Canon 17-55mm f2.8 lens with Image Stabilizer
Canon 50mm f1.8 lens (perfect for short trips but I sometimes forgo the lens if I bring the 17-55mm)
Canon 50-250mm f5.6 lens with Image Stabilizer
Lens Blower
Hama Cleaning Brush
Polarizer
External Hard drive
Card reader
2 batteries
Battery charger
Power Adaptor
2-3 San Disk compact flash cards
2. Postcards or Flickr
Before I get to a destination, I'd spend sometime studying the photos on Flickr to get inspiration. Flickr is a bottomless pit of resource and gives me plenty of ideas on what and where to take certain shots. Postcards are a wonderful source of inspiration too. I'm not above quizzing the owners of the guesthouses I'm staying for information either.
3. Light
The best time in the day to take photos is just before sunrise till approximately 10am and after 3pm. Outside of this time, I find the light tends to be too harsh. This is when a polarizer filter comes in handy. However, I love cloudy days as the light is diffused and colors are less washed out. If you're planning to take portraits, ensure your subject is in a well shaded area. If you're indoors, the light by the window is fantastic. I almost never use my flash. In the rare occasion that I do, I've put a white plastic cap on it to diffuse the light and I tend to bounce it so it won't be too harsh. I won't go into this too much as Neil Wade, a professional photographer explained it far better than I can. Click here to read his tips.
4. Explore
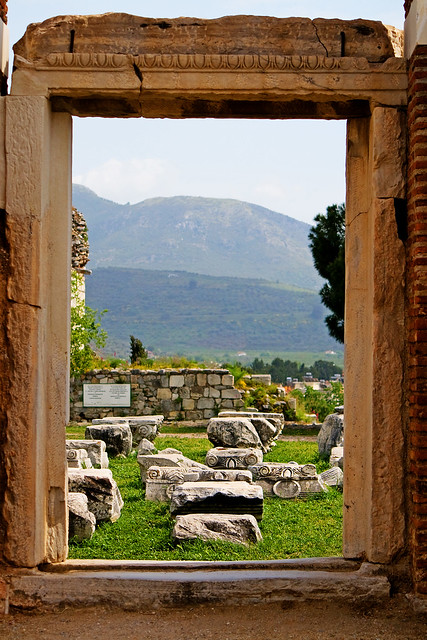
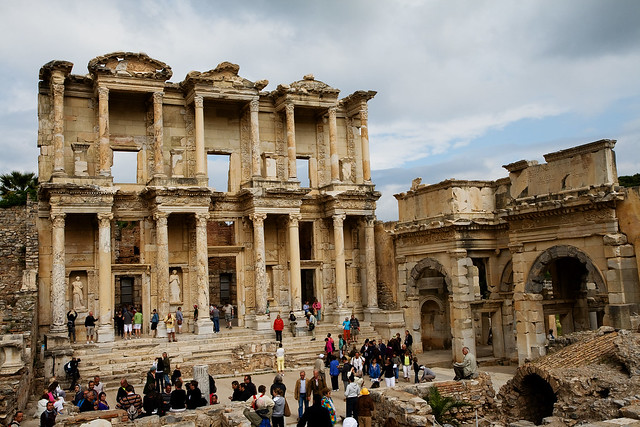
In the past, I tend to run around like a headless chook (that's Kiwi for a lunatic) trying to fit all the important tourist attractions in one day. I'm a little more sane these days and prefer to explore all the little nooks and lanes without a purpose in mind. Once when we were cycling through the countryside in Yangshou, China, I stopped to check out a primary school. I was allowed to enter the classroom and took a few snapshots of the students. The friendly teacher was happy to answer my countless questions, even inane ones like, "why are some of the students wearing a little red scarf?". My most memorable photos are usually ones that I inadvertently wandered into a place where most tourists don't go.
5. Composition
Depth of field
For scenic shots, I tend to set my aperture at f16 so that the entire background is sharp. As for portraits with a blurred background, I would go down to f2.8 on my Canon 17-55mm IS lens, f1.8 on Canon 50mm lens and f5.6 on the telephoto lens. It can be very confusing to newbies in particular trying to figure out the aperture to shutter speeds. I set my camera to aperture priority unless I want to take a photo of say, waterfall where I want to blur out the water. That's when the shutter priority button comes in handy. Remember the bigger the aperture, the smaller the f number, the more light it lets in. I hope I haven't confused you so far.
Move closer
Too often people try to fit the entire vista into a single photo. What you'll end up with is a busy scenery with no particular theme in mind. Once you isolate one single subject matter, you'll notice how much better your photo looks. Now, get closer and take another aim.

The Rule of Thirds
Try not to place your subject right smack in the middle of the frame. To make it more interesting, place it off center. Divide the photo in thirds with imaginary lines running vertically and horizontally.
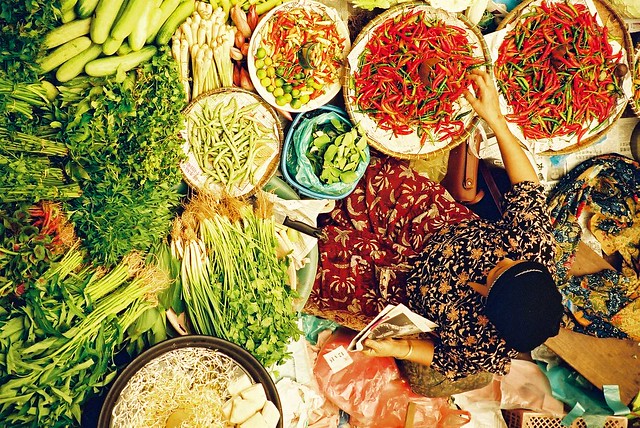
I saw a similar photo on a National Geographic magazine and was intrigued so I hopped on the plane to check it out. Photo taken at the Kota Bahru market, Malaysia.
I hope this has been somewhat helpful. I'd love to hear from you if you have any additional tips!
I find myself drawn to documenting people - how they're dressed, what they do and the expressions on their faces. I guess you could say capturing the moment in time. I love taking photos of the elderly. The wrinkles etched on their faces show character and tell a story. It's harder than taking a shot of the sunset or sunrise because all you have to do is make sure you're there at the right time, set up your tripod/monopod/bean bag and timer and pick the best spot. Taking photos of people is far more difficult because now you'll have to interact, be interested in what they do and make them feel comfortable while you're snapping away. Not an easy task if you're introverted by nature.
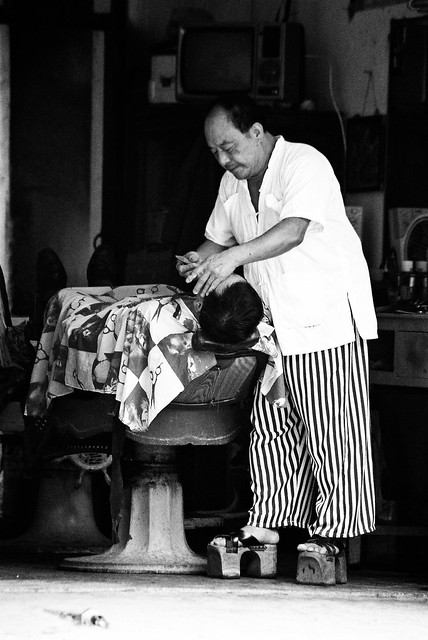
A barber wearing a pair of wooden clogs. He will cut your hair, shave and clean your ears. Taken in Yangshuo, Southern China.
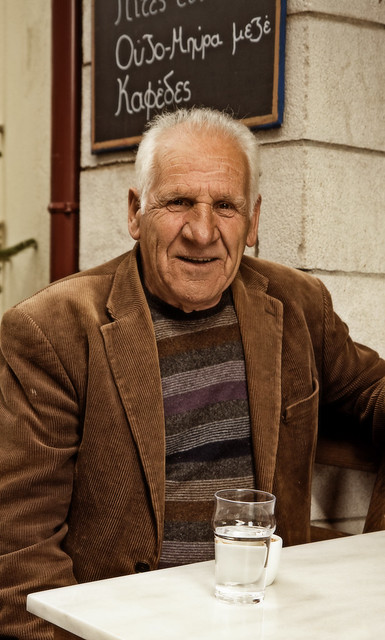
An elderly man having a cup of coffee at Dimitsana, Greece.
Unless you're a professional photographer, there's no need to carry multiple camera bodies and lenses. Thanks to Photoshop, I no longer require the half a dozen filters along with its adaptor which I used to stuff into the pockets of my bag. The only one that I'll bring along is the polarizer. It cuts down reflections and adds extra richness to shots taken particularly in the afternoon. Although I'd love to get myself L series lenses along with the super duper Canon 5D Mark camera, I simply can't justify the cost. These alloy lenses weigh a ton too and between holding on to Little L and my current camera bag, it's all I can manage now. I use a Cath Kidston satchel or hubby's Bill Amberg's messenger bag as camera bag these days. I'm a mom so I have to carry Little L's treats, water bottle and whatnots and the camera bags on the market just don't cater to my needs. Currently, this is what I tend to bring:
Canon 400D DSLR camera body
Canon 17-55mm f2.8 lens with Image Stabilizer
Canon 50mm f1.8 lens (perfect for short trips but I sometimes forgo the lens if I bring the 17-55mm)
Canon 50-250mm f5.6 lens with Image Stabilizer
Lens Blower
Hama Cleaning Brush
Polarizer
External Hard drive
Card reader
2 batteries
Battery charger
Power Adaptor
2-3 San Disk compact flash cards
2. Postcards or Flickr
Before I get to a destination, I'd spend sometime studying the photos on Flickr to get inspiration. Flickr is a bottomless pit of resource and gives me plenty of ideas on what and where to take certain shots. Postcards are a wonderful source of inspiration too. I'm not above quizzing the owners of the guesthouses I'm staying for information either.
3. Light
The best time in the day to take photos is just before sunrise till approximately 10am and after 3pm. Outside of this time, I find the light tends to be too harsh. This is when a polarizer filter comes in handy. However, I love cloudy days as the light is diffused and colors are less washed out. If you're planning to take portraits, ensure your subject is in a well shaded area. If you're indoors, the light by the window is fantastic. I almost never use my flash. In the rare occasion that I do, I've put a white plastic cap on it to diffuse the light and I tend to bounce it so it won't be too harsh. I won't go into this too much as Neil Wade, a professional photographer explained it far better than I can. Click here to read his tips.
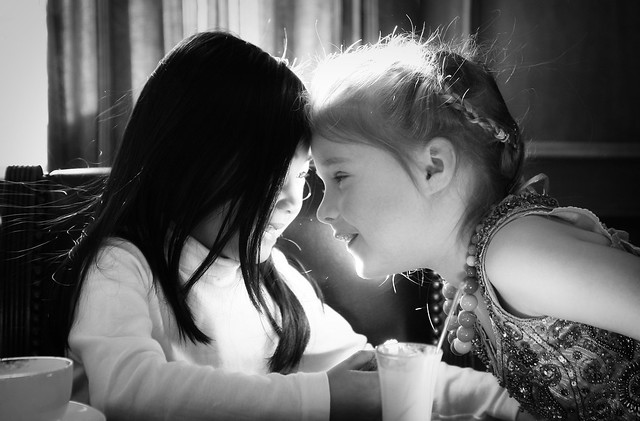
The birthday girl with her friend. You'll notice the light lits up their faces and hair creating a dramatic halo-like effect.
4. Explore
In the past, I tend to run around like a headless chook (that's Kiwi for a lunatic) trying to fit all the important tourist attractions in one day. I'm a little more sane these days and prefer to explore all the little nooks and lanes without a purpose in mind. Once when we were cycling through the countryside in Yangshou, China, I stopped to check out a primary school. I was allowed to enter the classroom and took a few snapshots of the students. The friendly teacher was happy to answer my countless questions, even inane ones like, "why are some of the students wearing a little red scarf?". My most memorable photos are usually ones that I inadvertently wandered into a place where most tourists don't go.
5. Composition
Depth of field
For scenic shots, I tend to set my aperture at f16 so that the entire background is sharp. As for portraits with a blurred background, I would go down to f2.8 on my Canon 17-55mm IS lens, f1.8 on Canon 50mm lens and f5.6 on the telephoto lens. It can be very confusing to newbies in particular trying to figure out the aperture to shutter speeds. I set my camera to aperture priority unless I want to take a photo of say, waterfall where I want to blur out the water. That's when the shutter priority button comes in handy. Remember the bigger the aperture, the smaller the f number, the more light it lets in. I hope I haven't confused you so far.
Depth of field of f1.8 with a blurred out background
Depth of field of f11 which shows a clearer background
Move closer
Too often people try to fit the entire vista into a single photo. What you'll end up with is a busy scenery with no particular theme in mind. Once you isolate one single subject matter, you'll notice how much better your photo looks. Now, get closer and take another aim.
This photo with lots of people milling about versus
this
The Rule of Thirds
Try not to place your subject right smack in the middle of the frame. To make it more interesting, place it off center. Divide the photo in thirds with imaginary lines running vertically and horizontally.
I saw a similar photo on a National Geographic magazine and was intrigued so I hopped on the plane to check it out. Photo taken at the Kota Bahru market, Malaysia.
I hope this has been somewhat helpful. I'd love to hear from you if you have any additional tips!


This really does help - I am the WORST! I sometimes wish I could hire someone to follow me around and take photos while I'm traveling! LOL! Your pics always stir something up in me - you capture little special moments, emotion and circumstance like the best of them. You say you're not a professional but this is your gift!
ReplyDeleteThank you! Your encouraging words mean a lot to me. My short term and long term memories are pretty awful but looking at these photos bring back fond memories :) I'm glad the tips are helpful.
ReplyDeletereally wonderful tips.
ReplyDeletemy husb and i are traveling in July and i did a lot of research on what lens to buy and take with me. my brother in law who is a photography enthusiast advised me to buy the one you have- the 17-55 or at a lower price point, the 15-85mm f/3.5-5.6. in the end, i bought neither- i am going to be seeing friends back in Rome, where i used to live, and i dont want to lug my dSLR and heavy lenses around with me- my point and shoot will have to suffice for good daytime photography. but these are great suggestions you have given me- for our next trip - thank you. x shayma
I'm so glad these tips have been helpful, Shayma. What a coincidence because I was just taking a peek on your blog profile last night to see what lenses you're using for your amazing food shots! The 17-55mm is very heavy but has crystal sharp clarity. The 55-250mm is very light and cheap but far superior to its more expensive counterparts.
ReplyDeleteMy husband is dying to go to Rome but we might leave it till later in the year. I can't wait to read about your travels. Have a wonderful time in Rome.
Thank you so much for the tips!! They are very helpful for a person like me who is learning how to just use the camera! Hopefully, I can learn to take beautiful pictures like you (one day)! You really capture the essence of whatever subject you photograph!
ReplyDeleteThank you, Sam. So kind of you to say so. Feel free to ask if you need any help with the camera.
ReplyDeleteThanks for the tip on Postcards on Flickr, I have to check that one out for my next trip. I'm not very good at taking pictures of people as I'm embarrassed to ask and sometimes don't dare to come close.
ReplyDeleteI go mad on Flickr weeks before I leave for the trip. Call me crazy but I start going through literally thousands of photos.
ReplyDeleteLOL. I got rid of my shorter telephoto lens to get the longer one. Some of the photos were taken discreetly. The 250mm comes in really handy! Believe it or not, I had people approached me (!!) to have their photos taken. Strange but true.